Sewer Camera Inspection: What It Can and Can’t Find
A sewer camera is a valuable tool to help determine if there’s a problem with your home’s sewer system. Maybe you noticed a nasty sewer gas odor. Or maybe your water isn’t draining as fast as it use to. Or worse, you’ve got an overflowing toilet
What is a Sewer Camera Inspection?
First, let’s cover what a sewer camera inspection is. Typically sewer lines are installed under the foundation of your house. There’s the concrete slab which is about 4 or 5 five inches thick and then about 2 feet or so of dirt above the pipe.
What a Sewer Camera Inspection Can’t Do
Despite what many in the plumbing industry think, there are limitations to what a sewer camera sees inside your sewer lines. But there is one thing a sewer camera absolutely cannot see.
Locate Leaks
A sewer camera alone cannot determine if you have a leak or to locate a leak or leaks in your sewer lines. In fact, this is so important, it bears repeating
Reasons Why a Sewer Camera Can’t Locate a Leak
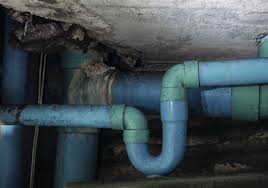
A leak is water escaping the pipe through a hole, break, or crack. Since the camera is inside the pipe, it cannot see the outside of the pipe. Meaning, it can’t see if something is leaking OUT of the pipe. It can only show what is going on INSIDE the pipe.
The plumber is looking at a monitor displaying what the camera “sees.” So the plumber has to interpret, or guess, what he’s seeing. He might think he see something that looks like a hole, break, or crack in the pipe. But keep in mind, this is your sewer system we’re talking about. This is where your waste flushes and runs through. Trust us when we say it does not look good. And all that gunk and waste makes it hard to tell if something is a leak based solely on what can be seen on the monitor.
Not Your Ordinary Camera
The cameras plumbers use for sewer line inspections look nothing like the digital camera you use to take family photos.
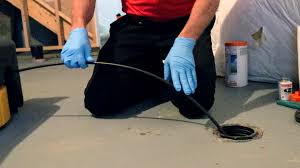
These cameras sit on the tip of a flexible pole or rod. The plumbing tech sends the rod through the plumbing pipe and as it travels, the camera sends a video signal back to the tech’s TV-screen-like monitor.
The camera captures footage of the entire length of the pipe. Most cameras come equipped with lights, which show cracks, clogs, or problems with the structure of the plumbing pipe.
Using advanced technology, the cameras also use an internal radio transmitter that records the depth of the pipe and the exact location of obstructions or defects. The plumber stores the footage on a disk, which they’ll for their reference if they need to make repairs. If you’re filing a claim on your homeowner’s insurance, your provider may request a copy of the footage for their records.
A drain inspection can get to the bottom of the issue
Most modern-day drain and pipe inspections occur through the use of video equipment. A tiny camera attached to a long line threads through the pipes and sewer lines in the home to expose via monitor any concerning issues like clogs, build up, cracks, breaks or root intrusion. Once the camera identifies the culprit, a repair or residue removal plan can be made to reverse the issue.
Use hydrojetting to clean the drain
Hydrojetting is a method of drain and sewer line cleaning that complements the use of camera inspections. First, a camera inserts into the pipes to determine the problem. If the problem is a clog, residue build up or root intrusion, a hydrojetter works to rid the pipes of the issue.
A hydrojetter is a machine that pumps high-pressure water through a long tube into the interiors of plumbing to remove clogs, grease and debris permanently. A hydrojetter does the same job as a plumbing snake, except it does the job better. While snakes can only break apart and push or pull debris out of the way, hydrojetters remove debris permanently by pushing it through and out of the system. Hydrojetters are also more effective on larger lodged objects.
In some cases, such as with older sewer systems, the plumbing is too delicate to receive a hydrojetting cleaning service. If this is the cases, more traditional and less powerful cleaning methods are necessary. A video inspection before the jetting process will help us determine the strength of the pipes.
How Home Inspectors Can Offer Sewer Scope Services
What is a Sewer Scope?
A sewer scope is a video inspection of the lateral sewer line from the house at or near the foundation to the city, HOA tap, or the septic tank. The purpose of a sewer scope is to discover and report defects that are visible in the lateral sewer line. The scope typically also identifies the material used within the sewer line itself.
Because a sewer scope serves exclusively as a visual observation of the plumbing system and lateral sewer line without any modifications or repairs being performed, most jurisdictions do not require the sewer scope inspector to also be a licensed plumber.
Time is Money
Because the equipment is lightweight and portable, adding a sewer scope inspection when you are already at a house for a standard home inspection is not a significant investment of additional time or energy. In fact, a typical sewer scope inspection takes only 30 minutes to perform.
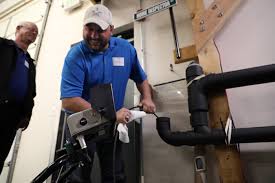
Making Your Money Work for You
The camera system is crucial in any sewer scope inspection. The reality is that these are significant monetary investments, with good camera system costing between $6,000 and $10,000. However, if you perform just three sewer scopes a week at $150 each, that would factor out to $23,400 your first year (a 200-400% return on investment). For a frame of reference, Colorado’s Best Home Inspections, a Colorado-based home inspection business that offers sewer scope services, performs five to eight scopes a week.
Sewer Scope Protocol
In order to perform a sewer scope inspection smoothly and effectively, certain protocols should be followed. To begin, run water in all locations to flush out the sewer lines. This will ensure that your camera equipment will have lubrication and will not catch on any debris. Additionally, the water will float the camera, which will allow it to be pushed through the line more easily. If you haven’t already, be sure to establish the location of the access point and check for leaks at the access/cleanout.
Before inserting the scope into the sewer line, there are a few essential steps that must be taken:
- Drop cloths should be placed in the work area to prevent dirtying the property or contaminating the surrounding soil.
- All camera equipment should be set up near the access location.
- Photos and/or video of the cleanout and camera’s location and setup should be taken.
- The camera equipment should be inspected for damage (loose camera head, cracked components, etc.).
- Remove the cleanout and turn on the camera, reset the counter, insert the USB drive and begin to record.
- Before inserting the camera into the line, scan around the room or area. It’s important to confirm and record the location of the sewer line so that the property owner can be assured that the sewer line is actually theirs (and that there was no mixup between video recordings, etc.).
At this point, you may begin the scope. During this process, do the following:
- While pushing the scope through the sewer line, make sure to pause at defects for at least five to 10 seconds so that you can document them.
- CAUTION: Do not force the camera through any obstruction.
- When the camera reaches the tap (the end of the section of the pipe that the property owner owns), turn off the water.
- IMPORTANT: While conducting the sewer scope, do not enter the backflow device, city tap, or septic tank.
- Begin to pull the camera back while it is still recording.
- Once the camera is pulled out completely, scan the room or area again.
- Re-install the cleanout.
- Turn the water back on to check for leaks.
Be sure to check the camera head and clean your equipment before and after every scope.