What You Need To Know Renting A Photo Booth

Reasons To Hire A Photo Booth For The Big Day

A wedding reception should be fun for everyone. One of the popular trends in weddings is hiring photo booths. Just like you and your partner, a photo booth and a wedding is a great match! Here are the reasons why you should hire a photo booth for the big day.

A photo booth is suitable for all ages

Adults love a photo booth and so do kids. It is nice to have something on your wedding that the children, parents and grandparents can join together.

Lots of entertainment

Your guests will just love the photo booth. When guests come out of the booth they will surely smile. They will love it so much that they will come back again and again. A photo booth is the highlight of your wedding reception and everybody will be pleased with the photographs.

Nostalgia

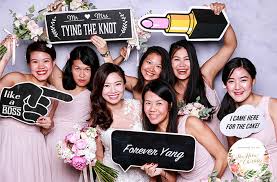
Back in the days we had no cameras on our phones. You had to squeeze into a photo booth to make an instant picture of you and your friends. Our photo booths look more stylish, but the concept is the same as the good old photo booths. There is just one exception: we add some fun props to make the photo moments more memorable.

Fantastic Favours

Give the gift of memories and photo booth fun from the day that guests can look back on for years to come. Skip the bag of wedding almonds, chocolates or shot glasses and thank your guests for sharing your day with a personalized photo. They’ll have a memory of how much fun they had on your big day and have a smile to remember it by. Customized templates will remember the date it took place and where. Now that’s a true THANK YOU! “Fun Cube was awesome and the photo booth was a huge hit! Great favours!”

Memories That Last

Guests will create photos for your guest book but they receive an instant print of their photos for a keepsake as well.  A wedding photographer is there to photograph the memories from the day, however your guests want photos too! So many people will see these photos for decades and so many people will ask questions about the fun they had at your wedding. What an amazing keepsake to have and share.

You can have photo prints as wedding favors

Probably one of the easiest way to opt out of a traditional favor that your guests will just throw away is to have a photo booth. Think about it, do you even keep the favors you’ve received from other weddings you have attended? We know it’s often the first thing guests leave in their hotel room or even on the tables at the reception. Instead of handing out a plant or homemade jam, think about giving photo prints that your guests can share online, frame, and most importantly, keep!

You’re also killing two birds with one stone – not only are you crossing off wedding favors on your never-ending wedding to-do list, you’re also (SPOILER! to the other reasons why you should have a photo booth at your wedding) getting a guest book, giving your guests a chance to document how great they look, adding an element that’s fun for all ages, and giving guests something to do during the awkward down time at a wedding.

There are so many ways you can customize them, too. Why not use the space at the bottom to thank your guests for coming? Or remind them of your wedding hashtag so they share the photos they took on their phones? Your photo booth company may even offer options other than a typical printout, such as: magnet frames, photo frames, and book marks.

Bringing People Together

It can sometimes be difficult to encourage guests to mingle at an event, especially when they don’t all know each other. Getting your colleagues from work to chat to your old school chums isn’t as easy as it seems but with a phootbooth, the process of breaking the ice is suddenly much simpler. Strangers strike up conversations while waiting for their turn and pose for shots together – before you know it, everyone is getting on swimmingly.

An Affordable Choice

Arranging events can be a costly business, but if you hire a photobooth from us, you’ll find that you can enjoy great value for money. For one low cost, you and your guests can benefit from some great entertainment, a lot of laughs and some precious mementos that will last a lifetime.

Photo booth for weddings: tips to capture the joy of your day

You want your wedding day to be as stress-free as possible, right? The good news is that with Simple Booth  and a little planning, your photo booth will basically run itself.

1. Choose the right location for your wedding photo booth

Put your wedding photo booth in a high-traffic area, like near the bar or dance floor. And wherever you put it, make sure that your guests can see it.

Weddings can get a bit hectic; if your guests don’t see the photo booth they’re not going to use it. We recommend putting your photo booth 5-10 feet away from one of the busiest areas in your reception venue.

But choosing the right spot for the photo booth isn’t all you need to think about. If guests have to fight their way through tightly packed tables, they’re going to be less excited to join in the fun. Keep space around your photo booth and make it easy to get in and out of the seating area.

2. Make the photo booth setup inviting

In order for your wedding photo booth to be successful, you’ll want your guests to jump in and have fun with it. Even the shyest guest will feel obliged to stand in front of the camera if you’re using the photos for a wedding scrapbook.

Let guests know that you need their help to build memories of your special day. Enlist your emcee, wedding party, and close friends to keep the photo booth fun going.

You’ll want to have signage and reminders throughout your venue to let guests know where the photo booth is and to encourage them to take advantage.

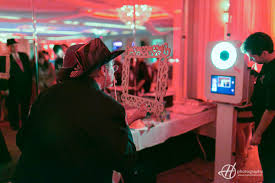
Of course, the best thing you can do is have an eye-catching photo booth that can capture the attention of your guests all on its own

Above all, the photo booth for your wedding should look inviting. We recommend having the area brightly lit and matching the photo booth area to your wedding’s style. You want your wedding photo booth to be another part of your reception venue that people will look at and say, “that’s beautiful!”

3. Create your own wedding photo booth backdrop

The right backdrop is essential for your wedding photo booth. It’s the focal point of your photo booth and should be beautiful and eye-catching without detracting from everything around it.

Your backdrop can be as simple as a blank wall. But, if you really want your personality to shine, bring the wall to life with decorations that capture your wedding’s style.

Not sure what you can do with a blank wall? Here are some ideas:

  • Fun, removable wallpaper
  • Hanging fabric
  • Vinyl decals
  • Fringe curtains
  • Hanging fresh flowers (or a flower wall)

4. Create a live event feed

Are you planning to have a slideshow at your wedding, telling the story of you and your love?

Get more out of that big screen by setting up a live feed from your wedding photo booth. You and your guests will enjoy (and laugh at) all the fun being had at the photo booth.

People love seeing their images popup up on the big screen in real-time and it will encourage other guests to join in

Common Questions About Loading Services

How to pack your van?

Our guide to packing & loading

Loading a truck might seem stressful, but with our helpful guide you can be confident in loading your van efficiently to make the best use of the space and avoid the need for multiple trips. Here’s how to optimise the space, avoid breakages, and help make your move as easy as possible.

Large appliances and white goods

The first items to go on board will be your large appliances and whitegoods. These large items will form a foundation for you to pack your belongings around, and are shaped perfectly and sturdy enough for boxes to go on top.

Be sure to completely defrost your refrigerator and drain your washing machine to avoid any unwanted water damage. Once your appliances are loaded onto your truck, carefully wrap them in moving pads and strap them in nice and tight to avoid any movement whatsoever.

Packing boxes

Packing boxes are ideal for getting the best use of the space in your van. After you have loaded your large appliances, next stack your packing boxes evenly from the floor to the ceiling of the van, starting with the heaviest boxes first and using your appliances as a base where necessary. This will not only make efficient use of the space, but will also ensure there is no room for items to shift around during transit.

Large and heavy furniture

Once you have your packing boxes stacked evenly, it’s time to start loading your heavy furniture on board. To avoid wasting space, it’s important to carefully prepare these items for transport with the use of moving pads and packing straps.

Moving into a new apartment

Moving Services

For anyone moving overseas, shipping household goods and furniture can seam overwhelming. There are a lot of details to consider when choosing international moving services

How to Move Internationally

No matter where you are moving overseas, the shipping process is moderately similar. Our representatives will work with you through the whole door to door process from one home to the next.

Initial International Moving Advice

Determining how much you want to move internationally is a vital step. Once you know your volume, you will have a better understanding of the services needed. It’s one of the more important questions to ask before an international move and it depends on your budget as well as where you will be living abroad

Overseas Household Shipments Include:

Full households, condo, or apartment in consolidation or sole container

Partial ie. offices, secondary contents(military)

Furniture

Antiques & heirlooms

Anything else you have

How Much Does it Cost to Move Overseas?

After figuring out your volume, you will want to get quotes from international moving companies. As with any relocation, international moving costs are based on multiple factors. These include the type of service, volume of your shipment, origin location, and final destination country.

PLANT MOVING GUIDE

If you carefully following these tips on moving plants, your house plants will be able to travel for up to three days before needing attention.

BEFORE YOUR MOVE

Follow these steps to condition your plants for moving so they can endure changes to their environment without wilting or breaking:

Three weeks before moving day. Re-pot plants from clay pots into shatter-proof plastic pots of the same size.

Two weeks before moving day. Prune larger plants by pinching back newer growth with your thumb and forefinger and removing dead leaves, limbs, and flowers with sharp scissors or gardening shears. Pruning will make the plants compact for easy handling and transport. It will also yield healthy, bushy, attractive plants after your move. Do not prune ferns and succulents (e.g., cactus, jade plants, aloe).

One week before moving day. Check plants for insects and parasites. If you apply insecticides, exercise caution and follow label directions. Pesticides are included on our list of non-allowable items, so have a plan for giving away or disposing of any pesticides before moving.

Two days before moving day. Water your plants normally, taking care to not overwater. Too much water can cause plants to freeze in cold weather or promote fungus growth in warm weather.

MOVING DAY

Prepare by packing your plants the night before or the morning of your move. Here’s how to pack plants for moving:

Wrap. Wrap large plants with an old bed sheet or tissue paper to prevent branches from breaking.

Position. Place each pot in a box so it fits snugly at the bottom. You may use regular moving boxes, like dish packs, available from your Agent.

Pack. If necessary, pack paper in the box around the base of the pot to hold the pot in place. Punch air holes in the sides of the box and loosely fasten the lid so plants can breathe.

Label. Set the boxes upright and clearly mark the top and sides. This will help avoid loading them by mistake into the moving truck.

Control. Keep the temperature in your vehicle at a comfortable level. Cold and hot temperatures can harm your plants.

ONCE YOU’RE HOME

Once you’re in your new home, it’s important to get your plants back in the same condition they were in at your previous home. Here’s how:

Unpack. Unpack your plants as soon as possible. Remove plants through the bottom of the box to prevent breakage.

Place. Place plants back in pots that are the same size as the ones before you moved.

Stabilize. Refrain from moving plants around until they become acclimated.

Heal. If your plant suffers from transplant shock after your move, give it a few days to recover. If your plant still looks unhealthy, follow our tips in “Common household plants and how to care for them.”

Common questions about Packers & Movers

Why should I pay token in advance before the move?

The token is to confirm the slot bookings and avoid any last minute delays or inconvenience. The token amount will be adjusted in the final payment of your quotation.

Why are weekend and month-end prices different?

The quote is calculated based on the availability of slots. Since there is high demand for movement during weekend and month-end, prices are generally high on these days.

Can I reschedule my movement after I have paid the token amount?

You can reschedule your movement by informing your dedicated move manager whose details are included in the confirmation email. Your move manager will reschedule the movement based on the availability of slots

My movement date is not fixed yet. How can I book in advance?

You can notify your dedicated movement manager to reschedule movement upto 2 days before the booked date. Change in movement date is FREE of cost for following categories: weekdays to weekdays, weekend to weekend, weekend to weekdays

Will the movers and packers also dismantle beds and other furniture?

Yes, we can dismantle and assemble beds and other furniture without any extra cost. However, you will have to notify your dedicated move manager before movement.

Guide to Moving House

Moving home can be a long and arduous process, physically, financially and mentally. It can also end up producing a lot of waste and rubbish as you sort through your possessions and decide what you want to take with you on the move. Therefore, to help keep yourself and your possessions in working order, we’ve compiled an easy to follow guide for moving house which will mean you spend less time worrying about what to do and more time simply getting on with it

Who Do I Contact?

Firstly, there will be a lot of people, including companies and organisations who you will want to contact about moving house. This isn’t just important for redirecting mail. Many organisations and databases need to be kept up to date with where you’re living, which can even be a lawful requirement in some cases.

Government Bodies

Department for Work and Pension

DVLA (before moving – as you may need your license for van hire and identification)

Electoral roll

HM Revenue and Customs (HMRC)

Your local authority (regarding your final statement on council tax)

TV licensing

Utility Companies

Gas, electric and water suppliers all need to be contacted when moving house. Tell them the exact date you’re moving and also take meter readings the day you move out.

Health Care Providers

The organisations which you receive healthcare from need to be made aware of your new address. Also, contact your new local NHS doctor’s surgery so that you are registered as soon as possible.

Domestic Electrical Installation

Electrical Installation Guide

According to IEC International Standards

The Electrical Installation Guide is a single document covering the techniques, regulations and standards related to electrical installations. It is intended for electrical professionals in companies, design offices, inspection organisations, etc.

This Technical Guide is aimed at professional users and is only intended to provide them guidelines for the defnition of an industrial, tertiary or domestic electrical installation. Information and guidelines contained in this Guide are provided AS IS.

The purpose of this guide is to facilitate the implementation of International installation standards for designers and contractors, but in all cases the original text of International or local standards in force shall prevail.

This new edition has been published to take into account changes in techniques, standards and regulations, in particular electrical installation standard IEC 60364.We thank all the readers of the previous edition of this guide for their comments that have helped improve the current edition.

What’s new in version 2015

Updated list of relevant IEC standards.

For example, the new standard IEC60364-8-1 “Low-voltage electrical installations – Part 8-1: Energy efficiency” published in October 2014

New content about LED lighting: characteristics and particular constraints of LED luminaires, selection tables to choose the proper circuit-breakers and relays

New content about Arc Fault Detection Devices (AFDD), as defined by new IEC 62606 (2013) and updated IEC60364-4-42 (November 2014)

“Connection to the MV utility distribution network” chapter completely re-written and updated, with more detailed information about protection in electrical installations, including the introduction of service continuity classes.

“MV and LV architecture selection guide for buildings” chapter partly re-written and including a description of the barycentre method, recommended by the new IEC 60364-8-1, to select the optimal location for the transformers and switchboards

New content about the selection of busways (busbar trunking systems) in presence of harmonics

Updated Energy Management architectures

This guide has been written for electrical Engineers who have to design, realize, inspect or maintain electrical installations in compliance with international Standards of the International Electrotechnical Commission (IEC).

Complete study

The aim of the present guide is to provide a clear, practical and step-by-step explanation for the complete study of an electrical installation, according to IEC 60364 and other relevant IEC Standards.

Electrical Installation Guide

Do you often work on low voltage electrical installations? Are you part of electrical engineering projects as a consultant, designer, contractor, panel builder or facility manager? Then keeping up with the IEC standards might be an everyday struggle for you all.

These experts accepted to share everything they know about complying with evolving standards and technologies while working on electrical installations. You’ll find precious information however if you work for industrial, commercial or domestic electrical projects.

the Electrical Installation Guide covers every important topic related to electrical installation; from MV/LV substations to voltage drop, from electrical safety to power factor correction, from electrical design to cable sizing, from electrical calculations to earthing schemes, from circuit breakers to electrical protection, from overvoltage protection to harmonics and more.

Brand new content about Photovoltaic for self-consumptionSolar technology is getting bigger and bigger around the world and you can find more and more photovoltaic systems installed on top of buildings to try and reach the “zero energy” target. Many of you wonder how to design, install or operate these photovoltaic systems, especially in the new typical installation trend where PV systems (or other local production sources) are exclusively used for self-consumption.

Along with these 2 new major features, you’ll find great information about LV Switchgear function and selection, Energy Efficiency in electrical distribution, Sizing and protection of conductors, Overvoltage protection, Internal arc withstand tests, LED lamps for public lighting and also Measurement standards updates. No to mention the new look&feel, improved illustrations, internationalized content and more

Electrical Installation Practice

Electrical Installation Practice covers all key aspects of industrial, commercial and domestic installations and draws on the expertise of a wide range of industrial experts. Chapters are devoted to topics such as wiring cables, mains and submains cables and distribution in buildings, as well as power supplies, transformers, switchgear, and electricity on construction sites. Standards and codes of practice, as well as safety, are also included.

there have been many developments in technology and standards. The revolution in electronic microtechnology has made it possible to introduce more complex technologies in protective equipment and control systems, and these have been addressed in the new edition.

Developments in lighting design continue, and extra-low voltage luminaries for display and feature illumination are now dealt with, as is the important subject of security lighting.

All chapters have been amended to take account of revisions and other standards, following the trend to harmonised European and international standards, and they also take account of the latest edition of the Wiring Regulations.

Electrical Installation Guide

The Electrical Installation Guide is written for electrical professionals who must design, install, inspect, and maintain low-voltage electrical installations in compliance with the standards published by the International Electrotechnical Commission (IEC).

Which technical solution will guarantee that all relevant safety rules are met? Answering this question has always been integral to the creation of this document. The guide is meant for all electrical professionals including consulting engineers, designers, contractors, panel builders, facility managers, electrical engineering students and teachers, as well as people involved in standardization, certification, or inspection of these electrical installations.

Electrical Installation Guide

General Contents of Electrical Installation Guide

General rules of electrical installation design.

Connection to the MV utility distribution network.

Connection to the LV utility distribution network.

MV & LV architecture selection guide.

LV Distribution.

Protection against electric shocks.

Sizing and protection of conductors.

LV switchgear: functions & selection.

Overvoltage protection.

Energy Efficiency in electrical distribution.

Power Factor Correction.

Harmonic management.

Characteristics of particular sources and loads.

Photovoltaic installations.

Residential and other special locations.

EMC guidelines.

Preface to Electrical Installation Guide

The task of the IEC Technical Committee 64 is to develop and keep up-todate requirements – for the protection of persons against electrical shock, and – for the design, verification and implementation of low voltage electrical installations.

Series of standard such as IEC 60364 developed by IEC TC64 is considered by the international community as the basis of the majority of national low-voltage wiring rules. IEC 60364 series is mainly focussed on safety due the use of electricity by people who may not be aware of risk resulting from the use of electricity.

But modern electrical installations are increasingly complex, due to external input such as – electromagnetic disturbances – energy efficiency – … Consequently, designers, installers and consumers need guidance on the selection and installation of electrical equipment.

It is based on IEC TC64 standards such as IEC 60364 series and provides additional information in order to help designers, contractors and controllers for implementing correct low-voltage electrical installations.

This guide has been written for electrical Engineers who have to design, select electrical equipment, install these equipment and, inspect or maintain low-voltage electrical installations in compliance with international Standards of the International Electrotechnical Commission (IEC).

“Which technical solution will guarantee that all relevant safety rules are met?” This question has been a permanent guideline for the elaboration of this document.

Best Practices For Immigration Lawyer In Corporate Firms

What does an immigrant lawyer do?

The immigration issues that have seen intense political debate and media coverage in recent years are only part of the story.

The United States sees a constant influx of people hoping to live, work, and study within its borders, and immigration lawyers can help individuals, families, and businesses navigate those various and often complex immigration pathways. A person’s immigration status might impact and intersect with other legal matters too, such as family law, criminal law, business, and tax law, and being well versed in immigration law is necessary for attorneys practicing in those areas as well.

Immigration lawyers may represent clients in administrative courts, or they may counsel clients about their legal rights and obligations related to immigration, among other things. They also suggest courses of action based on their knowledge of immigration law.

For example, immigration lawyers might help citizens of other countries through the process of gaining legal status to work in the United States with the H-1B visa program. This program provides a framework for American employers to hire non-U.S. citizens in jobs where their skills are needed. Individuals hoping to come to the United States to fill such positions must gain approval through a complex and often intimidating process. They (or often the employers hoping to hire them) often turn to immigration lawyers, who provide assistance in completing forms and taking other required steps. The lawyers may also represent clients in dealing with government officials in matters related to the visa application.

You can find immigration lawyers in various legal settings as well, from large law firms to smaller practices that include or specialize in immigration law, to government agencies to nonprofit organizations. (Every world-class performer or athlete has an immigration attorney behind them, advising on and securing necessary visas!) Some immigration attorneys provide services through a nonprofit or public interest law fair. Or they may prepare correspondence, meet with government officials, make presentations, and advise staff and volunteers, among other duties.

Finally, highly experienced immigration lawyers may pursue other career interests, such as teaching immigration law in law schools. Many universities have an immigration attorney on staff to advise incoming students and faculty as well. Other possibilities include becoming an immigration judge, a legislative aid (every member of Congress has an immigration advisor on staff), or an appointed or elected official.

Even criminal lawyers would be well-advised to understand immigration law, as they can be professionally sanctioned for failing to properly advise non-citizen clients of the immigration consequences of convictions, pleas, and sentences.

At the end of the day, immigration law can be a strong fit to students interested in human rights and international law, as well as those interested in business law or criminal law.

Applying For Citizenship

Immigration lawyers do much more beyond helping people become citizens of new countries. In addition to this task, immigration attorneys can defend a person’s case and prevent him or her from being deported to another country. A lawyer may provide legal advice about a person’s ability to obtain a work visa in another country for a specified period of time. If a student is studying abroad, then he or she may want to consult with a immigration attorneys for the appropriate visa.

An immigration attorney also helps people obtain citizenship through naturalization. You will need to receive various appointment letters and pass an English and Civics test in order to obtain citizenship through naturalization. Read about the other steps required from the Citizenship and Immigration Services.

An immigration lawyer can be very helpful when you are applying for citizenship from another country. The process of applying for citizenship can be very complex and time-consuming. A lawyer helps you gather the documentation you need to become a citizen. You may also be eligible to apply for citizenship through naturalization in a country like the United States. Here are the other general ways that an immigration lawyer can help your case:

  • Assist with citizenship tests.
  • Obtain immediate access to citizenship in emergency situations.
  • Represent you in court.
  • Help you start a business in another country.

Situations and people an immigration lawyer can help with include:

  • Immigrating to the United States
  • Helping your family to immigrate to the United States
  • Getting a Green Card
  • Becoming a United States citizen
  • Obtaining asylum or refugee status
  • Obtaining visas for workers and students
  • Obtaining legal status for people who are having trouble renewing a visa, or who have overstayed their visa
  • Obtaining legal status for people who are in the United States illegally
  • Preventing deportation or removal from the United States
  • People who are being tried for a crime that may affect their legal status
  • People who may be deported for a criminal conviction or immigration violations in the past
  • Helping people with a criminal record immigrate to the U.S.
  • Helping people who have previously been deported return to the U.S.
  • Obtaining legal status for people who are having immigration issues due to use of fraudulent documents, misrepresentation, marriage issues, medical issues, court history, or other circumstances
  • Starting a business in the United States as a foreigner, or employing foreigners in your business

What are Some Situations Where Hiring an Immigration Lawyer is Necessary?

Most persons hire an immigration lawyer when they need assistance in submitting an application for some type of immigration document, such as a visa or green card.  This is especially true when the person is unable to fully understand the various requirements under immigration law.

There are certain instances when hiring an immigration lawyer is absolutely necessary.  Some of these situations include:

  • If an applicant has been convicted of a crime: Nearly all USCIS forms ask whether the applicant has been convicted of a crime.  The applicant must disclose their entire criminal record, even for charges that were dropped or expunged.  It is usually not necessary to hire a criminal lawyer; immigration lawyers always understand how immigration and criminal law overlap.
  • Prior immigration applications have been denied: An immigration lawyer will be able to determine why the application was denied.  They can also tell if it is possible to appeal the application or re-apply later in the future.
  • If the person has previously been deported or excluded from entry into the U.S.:  Sometimes deportation or exclusion means that the person is permanently barred from future applications.  An immigration attorney can provide advice on the effects of deportation and exclusion.
  • If an applicant has a medical condition: Some, but not all medical conditions may prevent a person from obtaining entry into the U.S. (such as some communicable diseases).
  • When an applicant is waiting an unreasonably long time during the application process:  Immigration lawyers are familiar with application processes, including deadlines and waiting times.  A lawyer can sometimes help the applicant obtain expedited or rush processing.
  • If the applicant is seeking an employment-based visa, but their prospective employer is not assisting with immigration issues: Processing for employment-based visas can be complicated.  An immigration lawyer can help ensure that future employers are fulfilling their obligations to future immigrant workers.

Hire An Immigration Lawyer

Because obtaining citizenship in a country like the United States can take up to seven years for some people, it is essential to have a lawyer working on your side. A lawyer helps you submit the appropriate documentation to prove your case in court. An immigration attorney also helps ensure that you are handling the process with as much efficiency as possible. He or she will try to avoid any delays in helping you obtain your citizenship. When you have an emergency situation that requires you to go to another country, an immigration attorney helps you obtain the type of documentation that you need to legally reside within a country for a long period of time.

How Bad Is Mold Remediation

When to Call a Mold Remediation Expert

Molds can be the most unwanted guests to any home. They can slip into your house through the air in the form of spores, get stuck, and proliferate on damp structures until you notice untidy discolorations on your walls, ceiling, floor, and furniture. When molds infest your home, it will inevitably look unkempt and untidy. And not only that, you are exposed to some health hazards, and your home can eventually bog down if the infestation is not addressed.

Mold is a type of fungus that can travel through the air in the form of spore. When in contact with a damp structure, it can multiply to form a colony. Molds are important in our ecosystem because they help in the decomposition of organic things, but having them in our home is a serious problem

At the first sign of mold in a home, DIY solutions can be enough to stop the spread of molds. Preventive measures can also be done. Molds live in damp areas, so you should always check on moist areas in your home and keep the humidity inside your house at low levels.It may cost you some money, but it will be far worst when mold spreads to other parts of your house.

When You Cannot Trace Water Leaks

Dampness in some parts of your house, such as in the basement, kitchen, and bathroom, are caused by leaks in your water pipes. These areas are the most common sites of mold colonies. Fixing leaking water pipes will surely help in addressing the problem with molds.

When Molds Are on the Ceiling, Roof, and Exterior

Molds can cause your ceiling or walls to fall. They can also live in your roof and exterior walls of your house which are difficult to reach and clean. In the worst scenarios, molds can weaken your home’s foundation.

When Your AC System Is Infested

When molds enter the ductwork of your air conditioning system, it may be difficult to stop the spread of these harmful fungi. The spores may be carried through the air and may end up in other parts of your home. You may be inhaling them which can cause allergic reactions.

Home remedies mold removal or commercial mold remediation services?

Doing a quick Google search will show you how hiring mold remediation specialists is a somewhat controversial decision. Some people claim that mold remediation is just a cash grab, while others proclaim that it saves lives. Other people say you can handle home mold remediation yourself. The truth, as with most things, falls somewhere in the middle.

Just because you have a little bit of mold does not mean that your house has to be torn down. But, there are some scenarios when calling in the professional is a good idea. Mold can cause allergic reactions in some people and some mold—like the dreaded black mold—creates mycotoxins that are extremely dangerous to a human’s health. If not careful house mold removal can cause mold to spread and grow in other areas.

Commercial Mold Remediation Services

Mold Damage is serious and will only get worse if not taken care of. Here are a few reasons to call in professional mold / mould remediation specialists.

You are uncomfortable identifying different types of mold. There are thousands of mould species, and many look alike. For example, not all black mold is the dangerous Stachybotrys chartarum. If you are unsure about whether the mold you see is dangerous to your health, you need to call a professional mold remediation specialist.

If you have recently had a water event, such as a flood or burst pipe, then you should seek out a home mold removal service. Mold thrives in water, so it may be taking advantage of the recent water event to grow out of control in your home.

You should schedule a mold remediation is you smell a musty odor or see discoloration. A lot of mold will grow on upholstery like drapes and carpets. If you see discoloration in these places, it is likely that you have a mold problem. Most molds create a musty smell. Thus, a constant musty odor in your home could indicate a mold issue.

If you or your family begin to have unexplained health issues—especially upper-respiratory problems—you need to have a mold remediation right away. Professional services use techniques to make sure that the mold spores do not get released into your home’s air and cause further health issues.

Home mold remediation: Products for Removing Mold

If you see mold in your home, but it only covers a small area and you are not experiencing any of the symptoms listed above, then you may be able to take care of the mold by yourself. For example if you have a little area of black mold in bathroom this may be an easy fix. There are a number of products and procedures for removing mold at home. Home mold removal can be an inexpensive fix if found early. Mold can spread quickly and will cause mold damage that can become expensive to fix if not properly treated.

Home Mold Testing Kits

There are also a number of home mold testing kits available. While they are not as effective as a professional examining your home, they will let you know if you have mold in your home. If you are worried about having a mold outbreak, then we recommend picking up one of these kits. Finally, make sure to read the labels on your mold cleaning product of choice. The instructions will tell you how to use the product most effectively and how to keep yourself and your loved ones safe.

The Levels Of Mold Remediation

The most important thing in cleaning mold is to see the levels. Before you hire mold remediation, you have to consider whether you need professional help or not. Sometimes, you may need to save your money for other needs because you still need to fix other things in your house. Mold could be another problem when you neglect it. That is why the first thing before you decide cleaning it is by seeing the levels of mold remediation. We all know that it is not easy to identify the problems, but when we have read the guide, it is pretty easy to identify the level.

The importance of seeing mold level is to know whether you need to clean by yourself or call professional for it. The level of mold could be defined based on the size of your stuff. The higher level requires professional to clean the mold. We provide the understanding of mold levels is to make sure that you will not take a too fast decision in hiring professional because when you have enough professional equipment, you still can clean the mold by yourself without spending money and also you can save more money for other needs. Here is the level of mold remediations you should understand before you take action.

As we have mentioned before, the levels are considered based on the size and place of mold living. The first level is around 10 square feet or even less. What you have to do to clean the Level I mold is by cleaning it using commercial mold cleaner All you have to prepare is your health condition first and also the equipment. Make sure that you are healthy and not suffering asthma or allergies. You also need to make sure that your hands and face are protected properly.

Wear mask and glove when you want to clean mold level 1. Level 2 mold is around ten up to 30 square feet. Do the cleaning twice and vacuum moldy stuff or area you have cleaned. You can call professional service if you need it. Level III is 30 to 100 square feet. It is a big one, so you need mold remediation to clean the mold. Level IV is bigger than 100 square feet. It could be the biggest one and of course you cannot do DIY mold cleaning. The last level or level V is mold infected in AC system or HVAC. You have to call very professional service to clean the mold.

How to Clean Mold

A small leak in your kitchen turns into a black spot on the ceiling. An unventilated bathroom grows mold in the shower. Wherever there’s an excess of moisture in your home, unsightly (and unhealthy) mold is likely to follow. To learn how to clean mold from walls and furniture and even HVAC systems

They walked us through how to clean a small amount of mold on your own, plus how to tell when it’s time to call in the pros. More than just an aesthetic issue, untreated mold can cause breathing problems, trigger allergies, and even damage walls and furniture, so this is one home maintenance task you’ll want to tackle ASAP.

How to Tell If You Have Mold in Your House

“Visible growth may seem like an obvious sign you have mold, but don’t forget to use your sense of smell,” Sometimes a small amount of mold is assumed to be dirt, or mold may be lurking out-of-sight in your HVAC system—this is where your sense of smell comes in. “Is there a strange, earthy smell in your home that won’t go away, no matter how much air freshener you spray? Mold may be at the root of the issue.” That earthy scent is caused by microbial volatile organic compounds (MVOCs), or the gases produced by mold. If you suspect that mold may be hiding in your home’s air ducts, call in the pros to inspect your HVAC system and run tests for mold.

When to Clean Mold Yourself

“The general dividing line between homeowner cleanup versus professional remediation is whether the mold is covering under or above 10 square feet,” Also consider the location of the mold and how involved its removal might be. If there’s mold on drywall, removing it could reveal even more mold behind the finished surface, resulting in a more complex process. Plus, those with mold allergies should probably leave the cleanup to the pros.

How to Clean Mold

What You’ll Need:

Gloves

Googles

N-95 face mask

Liquid dish detergent

Scrub brush

Soft sponge or cloth

Follow These Steps:

Before you get started, protect yourself by wearing rubber gloves, unventilated googles, and a properly fitted face mask.

Mix a solution of dish detergent and water in a bucket. If you’re cleaning a non-porous surface like a cabinet or vanity, dip a brush into the solution and use it to scrub the mold away. For more delicate surfaces, use a sponge or soft cloth.

Absorbent materials that have gotten moldy, like carpet or drywall, will typically need to be removed. Once mold gets into fibers or porous materials, it can be very difficult to get rid of the mold completely.

Once all of the mold has been cleared away, make sure the area dries completely—after all, moisture is what got us into this situation in the first place. Use a cloth to dry off furniture, or open windows or set up fans to speed up the drying process.

Pro Tip: Avoid painting or caulking moldy surfaces. It may cover up the mold, but it’s not guaranteed to stop its growth and could lead to peeling paint later.

Mold Prevention Tips

1). Make sure you sprinklers are not getting the sides of your home wet. Replace spray types with bubbler type if with in 3 ft. of your home. Make sure you are not over watering.

2). Regularly check under sinks, toilets and behind the refrigerator if it has an ice maker.

3). If you have a flood, get it dried out immediately, don’t hesitate to call in a specialist with dehumidifiers not just fans.

4). Regularly check the evaporation drain tube for your HVAC system, these can put out 3 or more gallons of water a day and if it gets plugged up it can drain directly into your home.

5). Change the HVAC filter every 3 months.

6). Use a vacuum cleaner with a HEPA filter.

7). Open a window in the bathroom when showering and run the exhaust fan during and after showering to remove all steam.

8). Make sure all planters, slabs and walkways are below slab and sloped away from the home.

9). Do not have plants growing on or very close to the walls of the home.

10). Check and repair your roof after every wind storm.

Reasons Your Business Should Hire A Professional Payroll Service

Understanding your Payroll Deductions

What are payroll deductions?

Payroll deductions are taxes, benefit payments or wage garnishments that an employer withholds from employee earnings. They may also be called paycheck deductions. You must withhold paycheck deductions for all employees to whom you plan to issue a W-2 form, but not for any independent contractors or freelancers you work with.

What types of payroll deductions

With the start of tax season quickly approaching now is the perfect time to take a good look at your pay stub. It’s more than likely been awhile since you’ve taken a good look, especially if you have direct deposit. A regular review of your pay stub can ensure accuracy, but whether it’s your first or 100th pay stub, you may not understand what all the abbreviations and deductions mean.

Here’s a breakdown of the most common payroll deductions and the basic building blocks of a paycheck.

The Basics:

A pay stub generally includes:

  • Your taxable earnings.
  • Your gross pay – the total amount of money you earned in that pay period.
  • You net pay – the amount of money you take home.
  • Withholdings – these largely account for the difference between your taxable earnings and net pay.

Federal Income Taxes:

Federal taxes are calculated as a percentage of your income. When you start a new job, you fill out a W-4 form, or an Employee’s Withholding Allowance Certificate, to indicate the percentage of your income that you would like to be withheld. If the amount is too high, you will receive a tax refund after you file your yearly taxes. If you don’t have enough withheld, you will be responsible for the paying the balance. On your W-4 form, you are given the option to make allowances for yourself, your spouse and your dependents. For every allowance that you take, less money is withheld for federal taxes and more money is added to your paycheck. The fewer allowances that you have, the more money that will be withheld for your federal taxes.

State Income Taxes:

State taxes work like federal taxes, but are paid to the government of the state that you live in. Several states, including Texas, Nevada and Florida, do not collect state income tax.

Social Security and Medicare:

You are required by the federal government to contribute to Social Security and Medicare. Social Security is a system of supplemental retirement programs established in 1935. Every worker contributes 6.2% of their gross income and every employer contributes an additional 6.2% for each employee. Medicare is a government insurance plan that provides hospital, medical and surgical benefits for Americans 65 and older, and for people with certain disabilities. Every worker contributes 1.45% of their gross income to Medicare and every employer pays an additional 1.45% for each employee. If you see FICA on your pay stub, it stands for a law called the Federal Insurance Contributions Act, which requires employees to contribute to Social Security and Medicare with each paycheck.

Insurance:

If you have insurance through your employer, you are required to pay a portion of the plan premium. If you have any questions or concerns about your benefits, be sure to reach out to your human resources department.

Health Savings Accounts or Flexible Spending Accounts:

A flexible spending account allows you to set aside pre-tax dollars for medical expenses. Contributions to a flexible spending account are deducted from your pre-tax income. Health savings accounts are just another way to put pre-tax dollars aside for medical expenses. To be eligible for a health savings account, you need to select a high-deductible health insurance plan. Contributions to a health savings account are deducted from your pre-tax income.

Retirement Savings:

If you participate in your company’s 401(k) or 403(b) retirement plan, the percentage of your pre-tax pay that you choose to have withheld will be taken out of each paycheck and placed into a retirement account.

A regular review of your payroll deductions can help you identify any errors and get them addressed as quickly as possible. The last thing you want is for an error to be repeated through numerous pay periods. If you notice something unusual or have questions regarding your pay stub, reach out to your human resources department.

What do payroll taxes pay for?

The federal government levies payroll taxes on wages and uses most of the revenue to fund Social Security, Medicare, and other social insurance benefits. Federal income taxes also go towards things like defense and security.

State income taxes go towards a variety of areas, the most important being education and health care, as well as transportation, corrections, state police, parks and recreation.

Employee payroll taxes are usually made of these four taxes:

  • Federal Income Tax
  • State Income Tax
  • Social Security
  • Medicare

Employer payroll taxes are usually made up of these four taxes:

  • Federal Unemployment Tax
  • State Unemployment Tax
  • Social Security
  • Medicare

The amounts of these payroll taxes and what they pay for are highlighted in the table below.

Common Payroll Implementation Mistakes (and How to Avoid Them)

It’s one thing to shop around and look at different payroll providers. However, making the leap and actually implementing a new payroll system can be an overwhelming process. As a result, implementation mistakes are common and can sometimes sour relationships early on.

To ensure it’s smooth sailing from day one, we’ve highlighted some of the most common payroll implementation mistakes and how you can avoid them.

1. Lack of Planning

No matter how big or how small your company is, you need to have a plan in place before implementing your new payroll system. This involves tasks such as creating a timeline for the switch, identifying key stakeholders who will be impacted by the switch, ensuring that the right people will be available to facilitate the transition, and setting up training and support for those who will be using the new system.

For instance, if you have 20 employees and one payroll administrator, you’ll probably be okay handling the transition on your own. But if you have 4,000 employees across 20 payrolls, having one payroll specialist probably isn’t going to cut it. If you’re dealing with a significant amount of payroll data, you might consider bringing in a data analyst to carry out the data extraction, or a project manager to coordinate the switch.

When in doubt, you can always ask your new payroll provider what they recommend. In most cases, your new provider has carried out thousands of implementations, so they should be able to make recommendations for what is best for a team of your size.

2. Not Maintaining Data Integrity

In the immortal words of bookkeeper and Knit customer Sherri Lee-Mathers, “if you put garbage in, you’re going to get garbage out.” In other words, the kind of data you input into your new payroll system will influence what you get out. If the data is inaccurate from the start, it may become embedded in the system and result in significant errors over time.

To avoid the “garbage in, garbage out” scenario, it’s important to prepare your data well in advance. Before making the switch, take the time to:

  • Audit your current data.
  • Cleanse your data of anything you might not need anymore (keeping in mind that the CRA requires you to “keep all required records and supporting documents for a period of six years from the end of the last tax year they relate to”).
  • Identify any missing payroll fields.
  • Request any important documents from your current provider, such as copies of all Payroll Register Reports and copies of pay stubs for all employees.

While it may seem like a time-consuming process, taking the time to check for any inaccuracies or inconsistencies upfront will save you from countless errors down the line.

3. Not Customizing the Platform

For those unfamiliar with payroll processing or used to doing things manually, payroll software may seem like a kind of “one-size-fits-all” solution. In actuality, most payroll systems are extremely flexible and can be configured to fit your company’s exact needs. This means that companies that only work with the default settings are not getting the full benefits of the software.

To ensure that you are enjoying the full benefits of your new software, you should take the time to customize the platform to your company’s needs before you begin running payroll.

Statutory Payroll Tax Deductions

Statutory payroll tax deductions include the FICA (Federal Insurance Contributions Act) taxes. The FICA taxes consist of two separate taxes for Social Security and Medicare. Employees and employers both contribute to these federal payroll tax deductions, with each ponying up 6.2% for Social Security taxes and 1.45% for Medicare taxes.

Although you may feel a pang to see that money taken out of each paycheck, those deductions are the way workers pay into the Social Security and Medicare systems that eventually turn into Social Security benefits and Medicare coverage.

The biggest statutory payroll tax deduction is for the federal income taxes themselves. These are calculated according to each year’s payroll tax deductions chart. If you’re an employer who doesn’t have a computer system, payroll accountant or HR firm to do these calculations for you, you can seek out a payroll tax deductions online calculator or consult IRS guidelines.

Deductions can vary from year to year and are based on an employee’s salary and tax filing status (i.e. married vs. single). Employers may also deduct state and local taxes from employees’ earnings each pay period depending on whether the state, city or county require it. It’s the employer’s duty to collect the income tax that’s withheld, Social Security and Medicare taxes and send them to the IRS.

How You Can Practice Green Carpet Cleaning

Carpet Care Guide

You’ve purchased your brand new carpet, therefore you want it to look as good as the day you had it installed for years to come. Regular vacuuming and cleaning will help to keep it in a sound condition, as well as preventing any nasty odours, allergens or bacteria.

Carpets are an important part of our homes and can be considered an expensive purchase, so it goes without saying that you will want to maintain its good condition and prolong its lifespan. In a busy family home it wouldn’t take long for rooms to look untidy if the carpets were not regularly vacuumed and cleaned in order to remove dirt and dust. With regular cleaning you can continue to achieve the best appearance and feel of your carpet and be happy and able to relax.

How to clean a pet stained carpet

We all love our pets but they can be messy! Here’s a few tips for you to work on getting pet stains out.

1. Check your carpets fibre type then find an enzyme-based solution.

2. You want to test the solution on a small patch of your carpet, if it hasn’t affected the colour then use it on the stained area.

3. Either have your carpet commercially cleaned or rinse with water after the solution to has had time to work.

4. You can also hire or buy domestic carpet washers as well as vacuums specifically designed to pick up animal hairs. If you have large pets that could be something you may want to think about

How to steam clean carpet

1. We recommend that everything is taken out of the room if possible. If certain items are too heavy to move, then place something underneath to stop it from potentially being damaged.

2. Vacuum the area first and make sure the skirting boards are clean and free from any dust.

3. Your steam cleaner will come with its own instructions so it’s best that you follow them.

4. Start the furthest away from the door, avoiding the damp carpet. Also Steam cleaners are slower than vacuums, so walk slowly, about one step every two seconds.

5. Before moving anything back into the area, make sure the carpet is dry to touch.

How to deep clean carpet

1. Make sure the room is clear.

2. Vacuum the room removing as much dirt and dust as you can.

3. If you’ve recently purchased or rented the carpet cleaner we recommend following all the instructions including the cleaning solutions needed and measurements needed.

4. Start furthest from the main door you use.

5. Now you’ve cleaned the room, help the carpet dry quicker by opening any doors and windows you can.

Carpet Cleaning

Benefits of carpet cleaning

According to a report by the American Lung Association, dust accumulation in carpet and rugs can adversely affect members of your household who suffer from conditions that can affect their breathing, such as snoring or asthma. If you’re not fully convinced of the benefits of carpet cleaning

Carpet cleaning eliminates trapped pollutants

According to the Environmental Protection Agency, a dirty carpet can retain several sources of indoor air pollutants, including pet dander, cockroach allergens, lead, particle pollution and everyday dirt and dust. Toxic airborne gases can adhere to these particles and also get trapped within the carpet.

These toxic gases can be released through everyday activities such as vacuuming and walking across the carpet, which can cause them to contaminate the air in your home. Professional carpet cleaning services kill these bacteria through special carpet shampoo formulas and can remove deeply trapped pollutants with high-powered vacuums.

Carpet cleaning can clear out dust mite infestations

Many homes have dust mite infestations, yet most homeowners aren’t aware of the infestation because the creatures are microscopic. Dust mites themselves aren’t allergens, but they often leave behind feces and body fragments which are.

Because of the microscopic size of these particles, they can easily be inhaled when the area is disturbed, which can exacerbate allergies. Many professional carpet cleaners use a technique known as steam cleaning when performing carpet maintenance work, which exposes your carpet to high temperatures that dust mites can’t survive.

Carpet cleaning

Although there is an actual steam cleaning industrial process, in the context of carpet cleaning, “steam cleaning” is often mistaken for hot water soil extraction cleaning, which is professionally known as HWE. The hot water soil extraction cleaning method uses equipment that sprays heated water and detergent on the carpet and simultaneously, the water and detergent is extracted, along with any dislodged and dissolved dirt. Many experts recommend hot water extraction as the most effective carpet cleaning method

Actual steam could damage man-made carpet fibers and change the characteristics as they are usually set using heat. Woven carpets can shrink but most carpets are not woven and are in fact tuffed on a laminate backing, velvet-piled carpets and Berber carpets may become fuzzy which is known as pile burst.

Hot water extraction equipment may be a portable unit that plugs into an electrical outlet, or a truck mount carpet cleaner requiring long hoses from the truck or trailer. Truck-mounted equipment may be used where electricity is unavailable, but may be unsuited to premises distant from a driveway or road, and require hoses to pass through windows to reach the upper floors of a building. The hoses needed for truck-mount and professional portable carpet cleaning may present a trip hazard, and allow pets or children to escape through doors left ajar. Heated or air conditioned air can also be wasted when doors are left open for hoses.

Truck-mounted carpet cleaning equipment minimizes the noise in the room being cleaned, but may cause noise and air pollution offensive to neighbors, and could violate anti-idling bylaws in some jurisdictions. However, truck-mounted cleaning is much faster than portable equipment, and the extra heat will dissolve more spots and stains, and more vacuum suction power will reduce drying times.

A common process of hot water extraction begins with preconditioning. Alkaline agents such as ammonia solution for synthetic carpets, or acidic solution (such as vinegar solution) for woollen carpets, are sprayed into the carpet, then agitated with a grooming brush or an automatic scrubbing machine. Next, a pressurized manual or automatic cleaning tool (known as a wand) passes over the surface to rinse out all pre-conditioner, residue, and particulates. If an alkaline detergent is used on a woollen carpet, use of a mild acetic acid solution will restore neutral fiber pH. The acidic rinse thus neutralizes the alkaline residues, and can contribute to softening cleaned fabrics

How Much Does Carpet Cleaning Cost?

How We Get This Data

Carpet Cleaning Prices

Professional carpet cleaning costs between $121 and $233 for most homeowners, with an average of $177. Exact prices vary depending on the size and type of material as well as the cleansing method and whether you need stain removal.

The main benefit of regular carpet cleaning is avoiding potentially dangerous problems like mold, high levels of dirt or other issues. If you ignore it for too long, the cost to replace your carpet will range between $750 and $2,500.

Professional Carpet Cleaning Costs

The $121 to $233 overall price depends on the area you want to wash. Instead of charging hourly rates, most pros will focus on the square footage or offer per-room rates.

Carpet Cleaning Cost Per Square Foot

Expect to pay between $0.20 and $0.40 per square foot. Services who charge by the square footage visit your home before the actual job to measure and calculate the carpet size, and base their estimate on that.

If your home is smaller — a condo, apartment or one- to two-bedroom home — you’ll pay more for this service because of the added fees for travel and cleaning material expenses. Owners of larger homes will pay less because they’ll pay fixed prices.

Home Cleaning Guide: How Carpet Cleaning Machines Operate

Carpets can tie a room together. That said, they can also absorb large amounts of dirt, mold, bacteria and so much more. Even if a carpet looks clean, they are most likely filthy under the surface. Fortunately, carpet cleaning machines make it easier than ever to get the area looking spotless and like new.

What Exactly is a Carpet Cleaner

Carpet cleaning machines go by some names including cleaner, extractor or shampooer. They are designed to remove the dirt and stains that get deeply embedded in your carpet. The general process starts by having a rug pretreated with a cleaning solution and letting it soak for about fifteen minutes.

Types of Carpet Cleaning Machines

There is a wide range of carpet cleaning machines on the market that goes under different names. The most common one you are probably familiar with is “steam cleaners,” which use dry vapor steam during their process. However, this machine is ineffective at deep cleaning the carpet so you will want to look for a cleaner with true steaming and vacuuming features

Carpet cleaning machines also come in a wide variety of models. Typically, the machine will come with a large wand to clean with, but there are also walk-behind models that are quite similar to vacuum cleaners and very effective for cleaning a large area. There are also machines with additional attachments to clean other surfaces such as sofa upholstery, curtains and more. Professional carpet cleaners will have their kind of device that is not only faster but also stronger and more effective.

How Long Does the Process Take?

These days, carpet cleaning machines are more powerful and efficient than ever. A lot has to do with the size of the area that you want to clean. Generally, most people decide to go with either a partial or entire house cleaning. Of course, if you choose to hire a professional carpet cleaner for the job, the process will be done much quicker.

Becoming A Dermatologist

Things Your Dermatologist Wants You to Know Before Booking Your Appointment

From treating blemishes and filling hollows to diagnosing skin cancer, a good dermatologist can help any patient pinpoint the underlying cause of their issues or help them with an extra boost of confidence in next to no time. But, like with any other appointment, you may leave your consultation feeling as though you haven’t gotten the most of your visit. Don’t fret: there are ways to ensure a more productive appointment. Below, tips to know before you book your next visit.

Do Your Injectable Homework

Different types of injectables address different concerns, and it’s important to understand the basics before you arrive to help facilitate a conversation with your doctor about which is correct for you.

Neurotoxins, including Botox Cosmetic, Dysport, Xeomin and newcomer Jeuveau, block nerve perceptors in the skin that create wrinkles, lines and crow’s-feet.

Hyaluronic acid fillers, such as Juvederm, Restylane, Revanesse and Belotero Balance, on the other hand, don’t “freeze” anything. Instead, they restore plumpness to aging skin by “filling” the area.

Then there are the collagen-stimulating fillers, including Bellafill, Radiesse and Scluptra Aesthetic, that work stimulate the body’s own production of collagen for a longer period of time. (Popular treatment areas include the nasolabial folds, the backs of the hands, cheeks, lips and under-eye hollows.)

Bring in Some Photos

Understanding your skin can be a tricky thing, so bringing in some helpful photographs can be a great form of documentative evidence. Some skin conditions can be sporadic, and having photos on hand can definitely show your dermatologist just exactly what is going on.

Wear Loose Clothing When You Arrive

Dermatologist appointments can take some time, so you’ll definitely want to wear comfortable clothing upon your visit. But comfort aside, wearing loose clothing also makes it much easier to remove when given a gown for skin care exams. Oftentimes, patients tend to wear tight and complicated clothing, making it difficult to perform examinations.

Never Wear Makeup

You may rely on some foundation and concealer to get you through the day, but when visiting your dermatologist, it’s highly recommended to pass on the makeup. Your physician is definitely going to want to get a closer look at your skin, so going in sans makeup can help show what’s really going on when your dermatologist isn’t around.

Remove Your Nail Polish Before Your Appointment

Aside from treating a wide variety of skin conditions, dermatologists also pay close attention to the health of your nails, especially because some skin cancers tend to form on your nail beds. To help your dermatologist get a clearer glimpse of your nails, it’s wise to remove your nail polish before arriving to your appointment.

What to Expect from Your Visit to the Dermatologist

Visiting the dermatologist is an important part of maintaining your overall health. Your dermatologist can diagnose and evaluate a range of skin conditions, including skin cancer. If you’ve just scheduled your first dermatology appointment, you may be wondering what to expect. Here’s an overview of what will happen during your visit to your City dermatologist.

Beforehand

During your dermatology appointment, you’ll want to make sure that your dermatologist can easily examine all of your skin—including the skin beneath your nails! Remove any fingernail and toenail polish, and check over your skin yourself before your appointment. This will allow you to discuss any changes in your skin with the doctor.

During the Visit

When you arrive at your dermatologist’s office, you will be directed to a private exam room. If you will be undergoing a skin cancer evaluation, you will be asked to change into a gown. Your dermatologist will ask you a series of questions and discuss your concerns with you, and then she will look over your skin. The exam itself should only take about 10 minutes. During this time, your dermatologist will evaluate any moles, discoloration, and other skin issues on your body. If anything abnormal or concerning is found, your dermatologist may recommend a biopsy.

Afterward

Depending on your skin issues, your dermatologist may recommend specific treatments or medications. If you will be undergoing treatment to address a skin problem, you’ll be able to schedule your next appointment after your exam. If your dermatologist has prescribed any medications, you will receive an explanation of how to use those medications. It will then be up to you to follow your dermatologist’s instructions for medication use and daily skincare techniques.

Other Concerns

Screening for skin cancer

This type of screening is usually in the first part of your visit to the dermatologist. The screening may last for approximately 10 minutes and includes a visual inspection of all skin areas and all possible forms of skin cancer. A mole check may include checking your private areas and your scalp. Female patients can also request for a female dermatologist to make them feel more confident and comfortable during their appointment.

Skin care routine assessment

Dermatologists also want to know your skin care routine. They will ask you questions on how you take care of your skin at night and in the morning. After listening to your answers, they will recommend the best skin care routine for you and whether you should continue with your existing regimen.

Assessment of goals in aging patients

As people age, dark spots, wrinkles, and fine lines tend to become more visible. It is important to be equipped when it comes to your skin’s needs as you age. Dermatologists will be able to recommend skin care products, certain ingredients to look for, and the best solutions depending on your age, skin issues, and lifestyle habits. Having annual visits to the dermatologist is also recommended to effectively address anti-aging goals.

Remove your nail polish

Aside from acne, skin cancer, and other skin conditions, dermatologists also need to see your nails because some types of skin cancer tend to form on nail beds. In some cases, skin rashes are caused by nail fungus. There are also moles that can be found under the nails, so make sure to remove your nail polish before your dermatologist appointment.

Showcase skin concerns through photos 

Pictures of your skin problems can be a great and helpful evidence that you and your dermatologist can document. If you have taken photos of your skin issues, make sure to bring them with you on your scheduled appointment. Sporadic skin conditions can be quite tricky to describe or identify, so having pictures during your appointment can help the dermatologist understand what you are trying to explain.

Some other basic questions you should be prepared to answer:

  • How long you have had acne?
  • Does anything make it worse (for example, menses in females or stress)?
  • Did your parents have really bad acne?

Finally, have a list of any antibiotics that caused problems for you in the past, whether it was an allergy or just a bad side effect. Antibiotics are often used for treatment of acne, and knowing off the bat which ones you can and can’t take is very helpful.

And if you are a female and are pregnant or are thinking about getting pregnant in the near future, let your doctor know, because this affects what treatments are safe for you to use.

Being prepared with all of the above information will optimize your visit and help your dermatologist choose the best treatment for you.

Silverfish A Common Pest

How to Get Rid of Silverfish

First, Determine if You Have Silverfish or Firebrats

Before you start reading up on how to get rid of silverfish you need to make sure the bug you’re trying to get rid of is actually a silverfish. Believe it or not, there are several other small creepy bugs that look very similar to silverfish.

Second, Learn Why You Need to Get Rid of Silverfish ASAP

Besides the fact that there are nasty little bugs running around your home, there are other reasons why you will want to get rid of silverfish as soon as possible

Silverfish Facts » Why You Should Get Rid of Silverfish Right Now:

Silverfish don’t die or leave when it gets cold , they live up to 2-8 years…so when they find a home, they’re not leaving anytime soon!

Silverfish are most active at night and can jump up to two feet into the air (that’s high enough to get onto your bed!)

They can go up to a year without food , so removing all the things they eat in your basement won’t affect them it just motivates them to start exploring more parts of your house.

Most silverfish go unnoticed and will slip into cereal boxes, rice boxes, or anywhere they think is a good place for food or to lay eggs.

They can climb walls (so they can practically get everywhere inside without difficulty)

They have been around for 400 Million years , which probably is the reason why they are immune to most bug poison.

Silverfish eat things we surround ourselves with (paper, cardboard, glue) so at night when they come out for food they could be crawling everywhere!

Silverfish love toothpaste and eat the toothpaste remains off of toothbrushes, and have even been found INSIDE toothpaste containers!

Silverfish molt continuously throughout their lives leaving dead tiny body parts around your home!

Fortunately though, there has been no evidence that suggests that silverfish can spread or transmit diseases. Needless to say, this should still be more than enough reasons for you to want to get rid of the silverfish in your home as quickly as possible.

An Introduction to getting rid of silverfish

So now you probably realize that silverfish are a pretty tricky bug to get rid of…but just to recap:

Silverfish are immune to bug poison

They can go up to a year without eating or needing food

They don’t leave when it gets cold outside or if the house is uninhabited

Earwig & Silverfish Identification & Prevention

What are earwigs & silverfish?

Both earwigs and silverfish can be confused with each other but are two different species of insects. Both are occasional invaders, which means they live most of their life outdoors but sometimes move inside, seeking a damp environment when the weather becomes too hot and dry. Earwigs are reddish-brown, while silverfish are a silver color. Earwigs have pincers located at the end of their abdomens. Silverfish have a three-pronged extension at the end of their abdomens and move in a unique fish-like manner.

Are earwigs & silverfish dangerous?

While silverfish and earwigs certainly are not creatures you want living in your home, they aren’t dangerous pests. They don’t bite or sting people, and they aren’t known to spread diseases. Earwigs are a type of garden pest but only cause significant plant damage if their numbers are high. When disturbed, earwigs produce an odor that is not pleasant. Also, they can contaminate pantry items like flour, bread, and cookies. Silverfish living indoors may damage clothing, upholstery, and paper items by chewing on them. They also contaminate starchy pantry items like flour, cereals, pasta, and potatoes.

Why do I have a earwig & silverfish problem?

Silverfish and earwigs will move inside to take advantage of a home’s cool, damp areas and can become a problem in any home. Houston weather that becomes too hot, dry, or wet will drive these pests indoors. Earwigs and silverfish also hitchhike their way into homes in objects that were once outside like potted plants, newspapers, furniture, and boxes. Because they seek out areas of moisture, if these pests are in your home, there is a good chance there is a moisture problem present.

Where will I find earwigs & silverfish?

Silverfish and earwigs hide in damp, dark areas. They tend to gather near the foundations of a home under mulch, landscaping ties, leaf litter, compost piles, and trash cans. If it becomes necessary, they will move into homes and other structures through cracks in the foundation, exterior walls, and spaces under doors (especially basements doors). Once inside, they hide in areas that mimic their outdoor environments such as basements, bathrooms, crawl spaces, and laundry rooms.

How do I get rid of earwigs & silverfish?

The best way to live pest-free is to partner with the pest professionals at Pest Solutions. family wants to keep your family and home safe from earwigs, silverfish, and other pests. guaranteed services provide our home and business owners with fast, effective pest elimination

Silverfish

What are Silverfish and How to Get Rid of them

Silverfish have been around for millions of years and have been found in fossil records as early as the first land-living animals. Silverfish have survived for such a long time because they are known to survive in a variety of very tough environments. Silverfish are best known for their vast destruction of various household items such as books, photographs, artwork, clothing and accessories. Some people may be allergic to the faeces and cast skins (moults) of Silverfish, which may trigger conditions such as asthma

Description:

Silverfish are heavily segmented and soft-bodied insects, covered in fish-like scales. Depending on the age and species, they are between 2 – 18 mm in length, varying in colours of silver, gold, bronze and brown. The body shape is flattened from top to bottom; and when viewed from above, the body is wide at the head tapering to a pointed rear (abdomen). Often around the perimeter of the body are short fine hairs.

The head is small with two very small compound eyes on either side of the head, however, some species are eyeless. At the front of the head are a pair of very long and straight antennae, greater than half the length of the body. At the front and underside of the head are chewing mouthparts.

Behaviour:

Silverfish are fast runners; they can also jump and hop. When disturbed, silverfish either sit very still or swiftly scurry away. Silverfish also have an interesting and elaborate mating ritual.

Lifecycle:

After moulting and mating, adult females lay eggs in clutches of 7- 12 eggs, laying up 60 eggs at a time. In one lifetime, a female lays approximately 100 eggs. Eggs generally hatch within 20 days, however in sub-optimal conditions, they can take up to 40 days. Eggs hatch into juveniles (nymphs) which are similar in appearance to adults, only smaller and lighter in colour. Juveniles grow through 6 – 7 growth phases, shedding skin at each phase. Juveniles take 3 months to 3 years to reach full maturity. Silverfish can live for up to 6 years and continue to moult throughout their lifetime.

Household Bugs and Natural Remedies For Ridding Them

The arthropoda category includes almost every bug you can think of, including spiders, insects, centipedes, mites and butterflies. Arthropods make up 75 percent of life on Earth, so it’s no surprise that they have adapted to living in unison with humans and have taken advantage of our habitats as well.

When it comes to household bugs, these unwanted roommates can vary in visibility and impact on your home. One lone spider in a dusty corner may not harm anyone, but an infestation of bed bugs will definitely leave their mark. While it’s tempting to buy-out the bug spray aisle of your local hardware store if you have a bug infestation, these products can contain toxic chemicals that are unhealthy for you and your family (including your pets), as well as detrimental to the Earth.

Luckily, there are many common household items that can help you deal with your pest problem. These household remedies are easy to create and will help keep bugs out of your apartment in a safe manner. Save our visual for a quick reference on how to get rid of bugs the natural way!

While some landlords are responsible for pest control, they often will take a while to deal with the infestation or may use harmful products. Next time you spot one of these common household bugs, try taking preventative measures with these natural remedies.

Household bugs found in your kitchen

While bugs can be found in all parts of your home, here are a few of the most common pests in your kitchen — plus a few tips to keep them out.

How to Get Rid of Silverfish

If you’ve ever flicked the bathroom light on at night, you may have seen silverfish scurrying away from the bathtub or sink. These nocturnal creatures thrive in moist or humid environments, which is why they’re sometimes seen in the bathtub. Because they’re quick, catching them in a piece of paper to deposit them outdoors isn’t a practical option. Basic cleaning and moisture-prevention methods help keep these critters at bay, while a homemade trap can catch them.

Prevention

Because silverfish enjoy moisture, dry the bathtub after the last person has used it at night. Removing this moisture that they enjoy helps keep them away. If the faucet or showerhead drips, repair the drip as soon as possible, or place a small container in the tub to catch the water, dumping it frequently. Remove dust and stacks of books or magazines from the bathroom, as silverfish eat starch found in the book and magazine binding glues. They also eat some materials found in dust and enjoy hiding in dusty, untouched areas.

Trapping

Create a silverfish trap by covering the outside of a small glass jar with masking tape. Place the container in the tub at night, or along the sides of the tub — wherever you’ve noticed silverfish. The creatures will climb up the tape to get into the jar and won’t be able to climb out. Empty the jar outside away from the home, or fill the bottom of the jar with petroleum jelly, which the silverfish will stick to, unable to get out.

Auto Repair Estimates

How can I maintain my car myself?

Maintenance isn’t just about having your oil changed every 15,000 km or so, it’s about small, but important checks that will help to keep your car running smoothly and reliably, and safely.

GET TO KNOW YOUR CAR

  • Establish a checking routine as soon as you take possession of your car and stick to it. Pick a day of the week and allocate a few minutes to go over a few essential things.
  • Take the time to read the Owner’s Manual to familiarise yourself with the systems and features on your car.

WEEKLY CHECKS

  • Familiarise yourself with the location of the engine oil dipstick, automatic transmission fluid dipstick, windscreen washer reservoir and cooling system reservoir and how to check the levels and replenish the fluids when needed. Checking these once a week will take no more than five minutes, and may save you thousands of dollars by preventing a breakdown.
  • Also familiarise yourself with the tyre inflation pressures which should be checked weekly and reset as necessary. The recommended inflation pressures can be found in the Owner’s Manual and on a sticker attached to the body. It’s usually on the passenger’s side door pillar, but it may be located elsewhere. It’s location is detailed in the Owner’s Manual. When checking the tyre pressures don’t forget the spare tyre, there’s nothing more frustrating than suffering a puncture and finding that the spare is flat.
  • While checking your tyres inspect them for damage that could end in a blow-out. Particularly look for bumps and bruises on the sidewalls front being driven into or over kerbs etc., and check the tread for cuts, splits and nails.
  • It’s also worth familiarising yourself with the jack and how to change a wheel in the event of a flat. That way you won’t be stuck by the side of the road trying to work out how to use the jack while the traffic is thundering past a metre or so away.
  • Familiarise yourself with your car’s warning lights and what they are telling you when they light up on the dash. The lights should all light up when you turn the ignition on as a way of checking they’re working. If any don’t come on during that ignition-on phase then have them checked because a faulty warning light may cost you thousands of dollars in repair bills if you miss aren’t aware of a fault.
  • If a warning light comes on while driving, check it out. Don’t keep driving and assume it will go out. It’s worth taking a few minutes to investigate and assess the potential danger before driving on. Have a mechanic check the reason the warning light is illuminated.

MONTHLY CHECKS

  • Once a month check your lights to ensure they’ll all in working order, including headlights, high and low beam, tail lights, reversing lights, front, rear and side turn signals, and brake lights. It’s a good way of involving the kids by having them tell you each light is working as you switch them on. If any are not working check the bulbs and replace any that have blown.

DIY Car Maintenance

As newer vehicles have become increasingly complex with onboard computers and high-tech gadgetry, maintenance jobs now often require a mechanic with the proper training and tools to correctly complete the task.

But there are still a few maintenance jobs that most men can do themselves on most models, and below I list three of the most accessible. It’s true that taking care of these tasks doesn’t save you very much in either time or money, but it is satisfying nonetheless and I recommend trying each job at least once, as they’ll give you a reason to look under your hood as well as a small bit of insight into how your trusted chariot works.

1. Change oil every 5,000 miles. We’ve written a guide on how to change your car’s motor oil yourself. But for those living in an apartment or dorm, this might not be an option. Whether you do it yourself or take it to a mechanic, getting your oil changed regularly is one of the most important ways of keeping your car running smoothly.

2. Change air filter every 12,000 miles. This is quite possibly one of the easiest car maintenance jobs you can do yourself. We wrote how to do it here. Regularly changing your car’s air filter will increase fuel efficiency, prolong your engine’s life, and reduce emissions.

While changing your car’s oil comes with the hassle of finding a way to dispose of the used oil properly, no such inconvenience exists for the air filter, and doing it yourself will easily save you half the cost of having a service shop take care of it.

3. Rotate tires every 5,000 to 10,000 miles. Front and rear tires wear differently. Regularly rotating your tires equalizes their natural wear patterns, ensuring a smoother and safer ride. It also extends the life of your tires, which will save you money on costly replacements

Replace spark plugs

Spark plugs are vital to your car’s engine running properly. They ignite a fuel and air mixture in the combustion chamber, which drives the piston down, turning the crankshaft. Your car has several pistons that work together to fully turn the crankshaft. Timing is essential, and even one spark plug misfiring or not working properly can dramatically affect your car’s performance, such as a loss of power, poor acceleration, misfires and it can even affect your ability to start the engine.

Changing spark plugs is a little more involved than checking fluids or replacing an air filter, but it can still be done at home quite easily.

In most cases, you’ll need one plug per cylinder, but some vehicles require two per cylinder. Check your owner’s manual for the correct number and types of plugs. Also, take note of the required gap. (You might want to pick up a gapping tool while you’re at the store, since this can be inadvertently bumped in transport and should be measured and corrected before installed.)

To replace spark plugs, first let the engine temperature cool. Then change spark plugs one at a time by gently removing the wire from the spark plug. Use a spark plug socket and torque wrench to remove the old spark plug. Measure the gap and install the new spark plug. (Some prefer to use antiseize lubricant with new spark plugs, but it’s not necessarily required and some spark plug manufacturers recommend not using it.) Reconnect the boot and repeat the process for each spark plug.

Battery Maintenance

Tools You Need: Wrenches, corrosion-removal fluid, wire brush, rags

The key to keeping your car running smoothly and efficiently is a good battery connection. Just a few specks of crunchy white residue on the posts can keep your car from starting. A simple visual check of the condition of your battery will tell you when you need to perform this process.

  • Remove your battery terminals, which should be a fairly straightforward process. Make sure you always remove the negative cable first. If they’re stuck, use a flathead screwdriver to pry them loose.
  • Clean the posts. Some say Coca-Cola will work, and it does, but I suggest using a more professional product from your local auto parts store. Keep in mind that most of these solutions are nothing more than baking soda and water, so if you’re feeling extremely frugal, feel free to create your own cleaner. Generously apply the fluid to the posts, and clean vigorously with your wire brush.
  • Rinse the cleaning fluid with a little water.
  • Dry the posts with rags.
  • Replace battery terminals.

A dead battery can be one of the most frustrating car problems, because it’s usually so simple to avoid the trouble. Especially if you’ve had the same battery for a few years, pop your hood every few months and take a look at the battery to see if it needs a simple cleaning.

Replace a blown fuse

If something electronic on your car randomly stops working, like the lights, stereo or power windows, chances are it’s a blown fuse. Fixing a blown fuse is one of the easiest repairs you can do yourself.

Most modern cars have two groups of fuses in panels, one typically found beneath the steering wheel and the other under the hood.

You can often perform a visual inspection to find a blown fuse. Look for a fuse that appears slightly melted, or check the internal u-shaped wire. If the wire is separated, the fuse has blown. You may need to pull the fuse to inspect the wire. The good news is, if you know what has stopped working, you can immediately narrow the search by referencing the inside cover of the fuse panel lid and the owner’s manual. Many fuse boxes also come equipped with a fuse removal key, but a pair of needle nose pliers will also do the trick.

You can pick up a variety pack of fuses from an automotive parts store for a few bucks. Just make sure to get the correct size and type for your car. Many newer cars use shorter style fuses, which are not compatible with the older style fuses with longer leads.

Once you locate the blown fuse, remove it and replace it with a fuse rated for the same amperage.